Start Your Seeds Right: A Guide to Using a Cold Frame
A cold frame is a simple yet powerful tool for gardeners who want to get a head start on the growing season. These mini-greenhouses create a protected microclimate, allowing you to sow seeds weeks before the last frost, and even extend your growing season into the fall.
Whether you're a seasoned gardener or just starting out, a cold frame can help you cultivate healthy seedlings and boost your gardening success. Let's dive into the details of how to use a cold frame for seed starting!
Choosing the Right Cold Frame
First things first, you'll need to select a cold frame that suits your needs and space. Cold frames come in various shapes, sizes, and materials. Here's a quick rundown of the popular options:
Types of Cold Frames
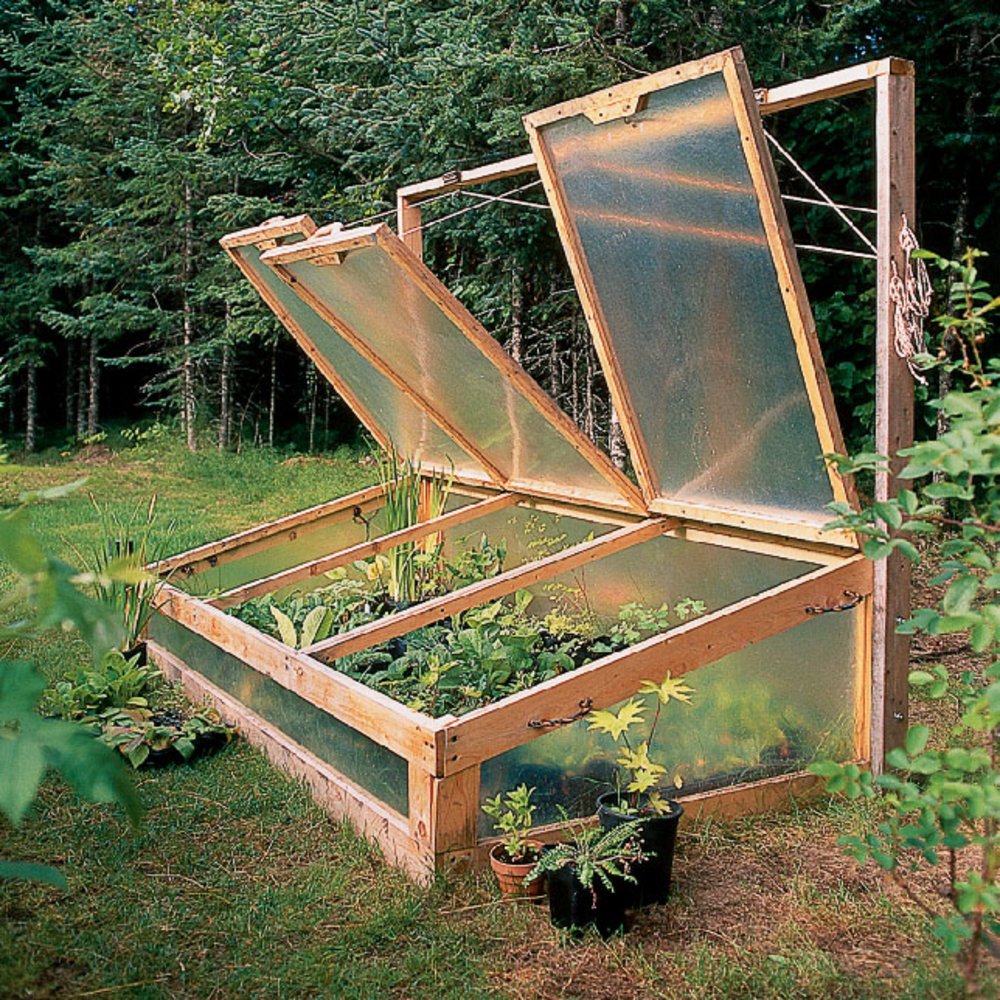
- Wooden Cold Frames: These are a classic choice, known for their durability and ease of construction.
- Plastic Cold Frames: Lightweight and portable, plastic cold frames are great for smaller gardens.
- Metal Cold Frames: Often featuring a more modern design, metal cold frames offer sturdy construction and can withstand harsh weather conditions.
Consider the size of your garden, the types of plants you'll be starting, and your budget when making your choice. A larger cold frame allows you to start more seeds, while a smaller one might be more manageable if you have limited space.
Setting Up Your Cold Frame
Once you've selected your cold frame, it's time to set it up for optimal seed starting. Here's a step-by-step guide:
Location, Location, Location
Choose a sunny spot for your cold frame. It should receive at least six hours of direct sunlight each day. A south-facing location is ideal for maximizing sunlight exposure. Make sure the area is well-drained, and slightly raised to prevent waterlogging.
Preparing the Soil
Fill your cold frame with a high-quality seed starting mix. This should be a light and airy mixture that drains well, allowing roots to develop properly. Consider adding some compost or aged manure to enrich the soil and improve drainage.
Adding a Layer of Protection
To further insulate your cold frame and prevent heat loss, add a layer of protective material to the bottom of the cold frame. Straw, newspaper, or even a layer of bubble wrap can help trap warmth and create a stable environment for your seedlings.
Starting Your Seeds
Now, it's time to get your hands dirty! Follow these steps to sow your seeds in the cold frame:
Choosing the Right Seeds
Start with seeds that are appropriate for your climate and growing season. Research the germination requirements of your chosen seeds and select varieties that are suitable for cold frame cultivation.
Sowing the Seeds
Carefully sow your seeds according to the instructions on the seed packet. Make sure to space them out properly, as overcrowding can lead to weak seedlings. You can also use a seed tray to start your seeds and then transplant them into the cold frame once they have a few true leaves.
Watering and Ventilation
Keep the soil in your cold frame consistently moist. Avoid overwatering, as this can lead to root rot. You can use a watering can with a fine rose or a gentle misting bottle to water the seedlings. Provide adequate ventilation by opening the lid of your cold frame during warmer days and closing it at night to trap heat.
Caring for Your Seedlings
Once your seeds have sprouted, continue to care for them regularly. Here are some key tasks:
Thinning
If your seedlings are too close together, thin them out, leaving the strongest ones to flourish. This will ensure that each plant has enough space to grow and develop a healthy root system.
Hardening Off
Before transplanting your seedlings to their permanent location, you need to harden them off. This gradual process acclimates them to the outdoors and prepares them for the change in environment. Start by opening the cold frame lid for short periods each day, gradually increasing the amount of time the seedlings are exposed to the elements. After a week or two of hardening off, your seedlings will be ready for transplanting.
Troubleshooting Common Problems
While cold frames offer a controlled environment for seed starting, you may encounter some challenges along the way. Here are some common problems and their solutions:
Damping Off
Damping off is a fungal disease that can affect seedlings, causing them to wilt and collapse. Proper ventilation and watering can help prevent this issue. Use a fungicide if needed to control damping off.
Overwatering
Excess moisture can lead to root rot and other problems. Ensure the soil in your cold frame drains well, and avoid overwatering.
Pest Control
Keep an eye out for pests like slugs, snails, and aphids. Use organic pest control methods or introduce beneficial insects to deter pests.
Enjoy the Rewards
Using a cold frame for seed starting is a rewarding experience. You'll enjoy the satisfaction of nurturing your seedlings from tiny seeds to sturdy plants ready for transplanting. By following these tips, you'll be well on your way to a successful and bountiful garden!

0 comments:
Post a Comment
Note: Only a member of this blog may post a comment.